Key strokes are identified in italics. Where you see A/Alt, the A is the Left Amiga Key, and Alt is the Dos/Win equivalent. In places you'll see something like Z-90, just to note, that isn't a hyphen, it mean Z minus 90. Heh, gotta make sure you get it :)
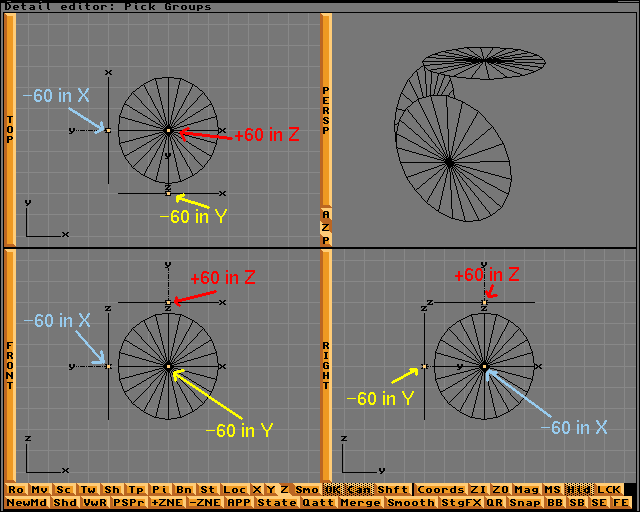 |
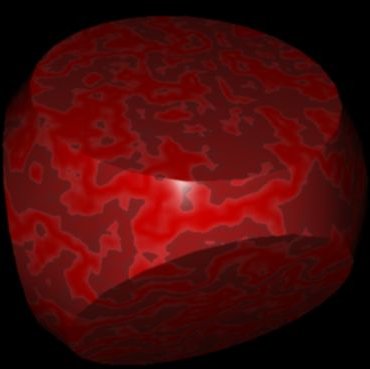
To end up with something resembling what you can see in the image on the left, do this:
Note: axi that I don't mention, should be left at default.
|
| Now you have the discs arranged and aligned, you need to add a central
Axis to make life a bit easier later on.
Make sure the workspace is centred (project->reset view) and add a
new axis F4. Select the new Axis F1. With the axis selected, you need to select all the other objects. Press A/alt a or shift/click the objects to multi-select. With all objects selected, join the objects together so that they become a single object A/alt j. You will now see only 1 object axis in the centre of the workspace. Check your view against the image on the left to make sure you got it right. | 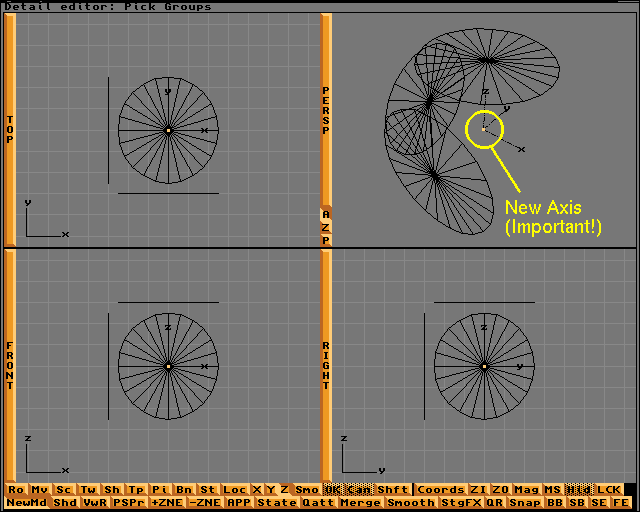 |
 |
We all know that dice normally have 6 sides. Why have you only added 3? You'll find out soon
enough, but first you have to butcher the discs you have worked to hard to position :)
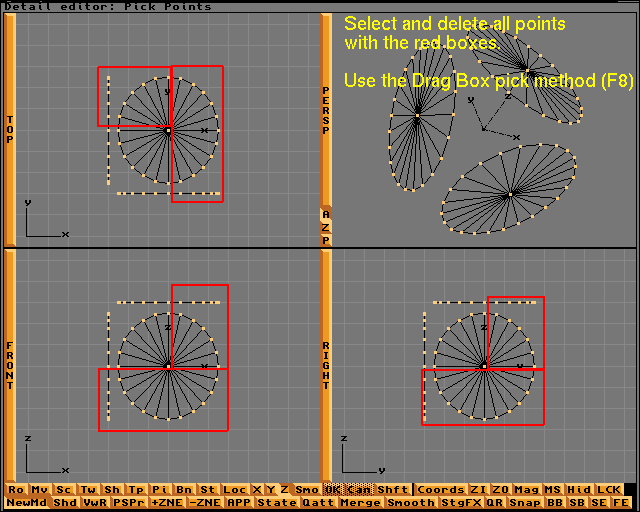
Select the object. Go into pick points mode a/alt 3. You need to shear away a few points.
|
|
The next part is one Imagine novices seem to find quite disturbing; Adding faces by hand :) It's actually very easy, and combined with fill to edge line, a very powerful feature. We'll not be using fill to edge here, as we are only adding a hand full of faces.
Go into the perspective view. Place the pointer at the top left edge of the object, then clicking
and holding the left mouse button, drag the pointer to the centre of thee view. Go into add faces mode a/alt 8, and turn off perspective rotation(click the little P to unselect it). Now you can begin adding faces. Take a look at the image, and you'll see the faces you need to add. I've coloured the edges, and filled the faces, so they show more clearly. All Imagines' faces have 3 point. To add a face, simply click 1 point, then another, and a third to form a triangle. Start at the left side. Click the lower left point, then click the point directly above on the upper left. finish off the face by clicking the second in from the left, on the lower line; if you see what I mean :) Work your way across the object adding new faces. The Image on the right shows what you need do very clearly. | 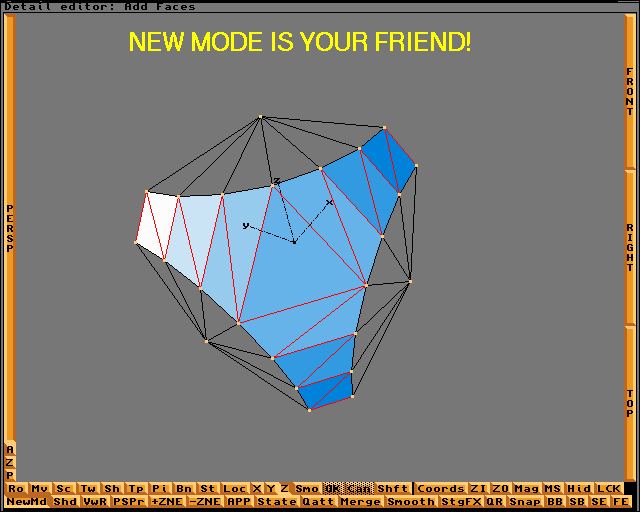 |
 |
The final stage is to Copy, paste, and mirror your object into a fully faced die.
Go back to a quad view, and select the object. Paste down the previously copied object. Press shift and F1 to select both objects. Join them so that you have a single object.
Copy the joined object, and repeat the above process, but substitute X with Y in the transform dialogue
Now you should have the whole top half of the die. |
|
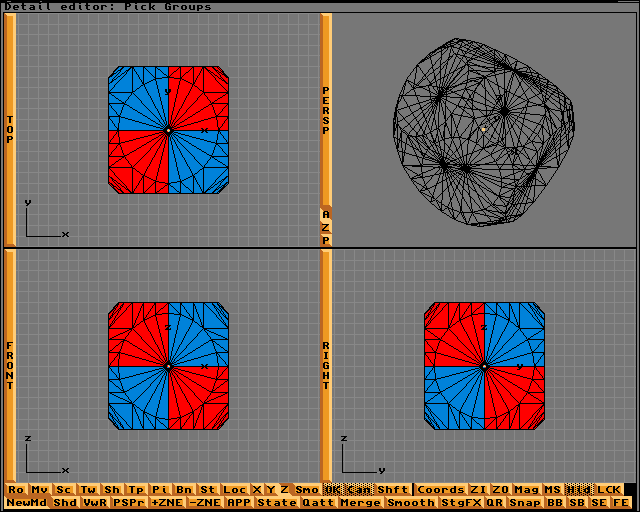
When I said that the last bit was the final stage; I lied. There's one thing you should always
do to every single model you ever make. Select all of it's points, and merge them. The reason you merge, is because you will have duplicate points in your model. In this die, there will be duplicate points all around the centre of the object, and they will cause a seem to show when you render. One thing to note. For some very bizarre reason, not all the points will merge! The suspect points look as though they share the same space, but they are actually a fraction of a unit apart. Weird, eh?
I have selected the points that are likely to give you grief in the image on the right. To get them right for merging, they need to be snapped to the grid.
Select the points shown in the image, and set the grid size a/alt - to 0.1. Snap the points to the grid, then merge again. | 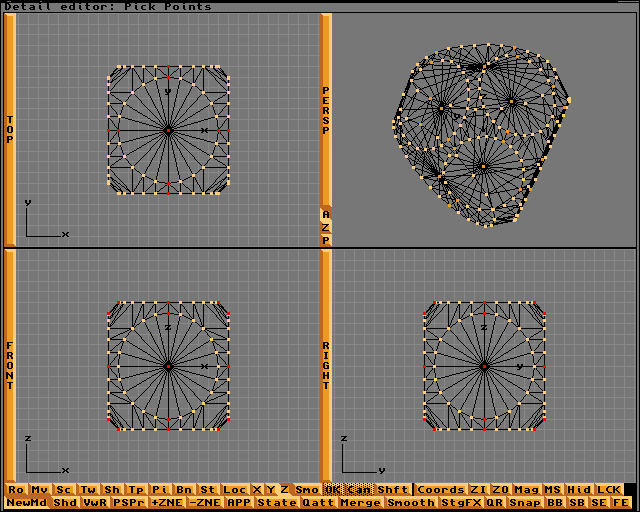 |
The End