Oily Streaks of stuff!
A Tutorial by Andy Kinsella, at the request of Steve Thornber. ©1999
Have you ever needed to draw some panels for a spaceship, or other panelled model; and spent more than a bit of time using smudge or smear
to create half decent looking streaks of oil and dirt?
There must be a quick way to do it, thought I. Well, there is.
Note: I used photogenics 1.2, but the techniques should be easy to translate into any image processor that
has any kind of independent layer(s).
This is my "quick and dirty®" guide to adding streaks of oil and stuff to your spaceships. Read on!
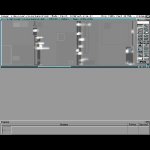 |
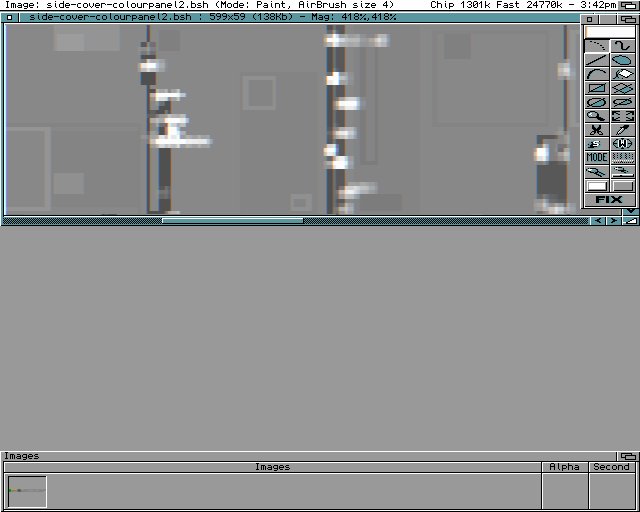
Load your previously created panels image into photogenics' main buffer.
With your paint color set to full white, make your airbrush a small size (around 3-5); and proceed to apply
splodges of paint to your panels. Paint should be applied anywhere where there are gaps in the panelwork. On vents and stuff.
You needn't be too precise, and It will be good to vary the size of the splodges a little. Do not Fix the Image.
Click the imagelink on the left for a bigger picture.
|
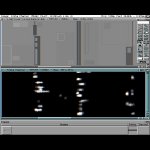
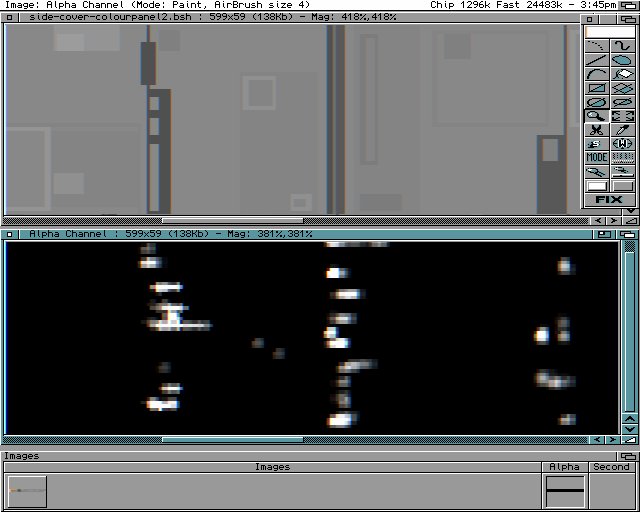
The next step is to copy the paint layer into the alpha channel buffer.
Do this by selecting move paint layer to alpha from the Image/Alpha menu.
If all has gone to plan, you should have a new image in the alpha buffer that looks like the one in the image on the right.
Click the image to see a bigger version.
|  |
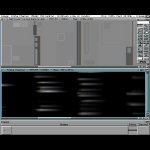 |
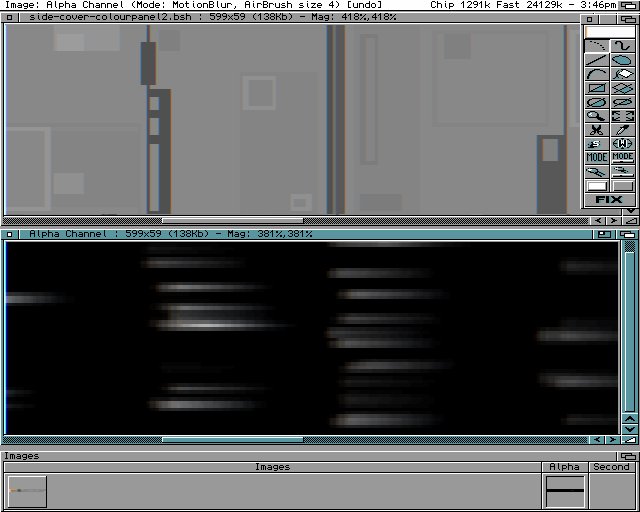
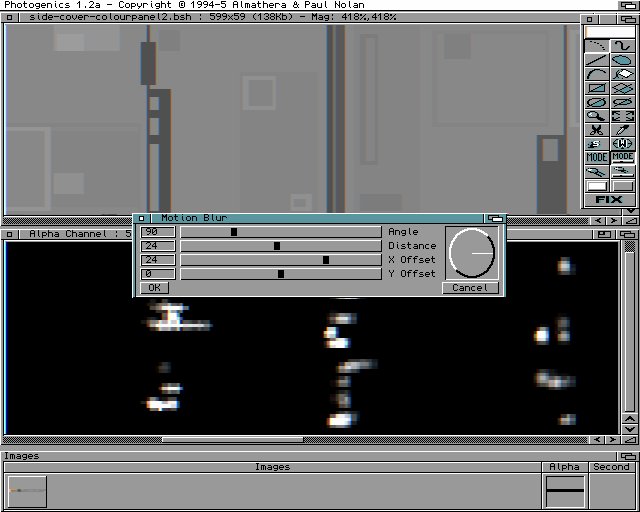
The next step is to apply a motion blur to the alpha channel.
It's the motion blur that creates the actual streaks. The length and direction of the motion blur depends on a couple of things.
- Travel direction. i.e. A forward moving vehicle will have horizontal streaks, while a vehicle that moves upwards (a rocket) would have
verticle streaks.
- The length of streaks is relational to the brushmap size, and speed the vehicle will travel at.
In this example, length is 24 pixels, and direction is 90°. See Grab 3
for a butchers at a grab with the motion blur settings. Apply a Fix to the now blurred alpha channel.
|
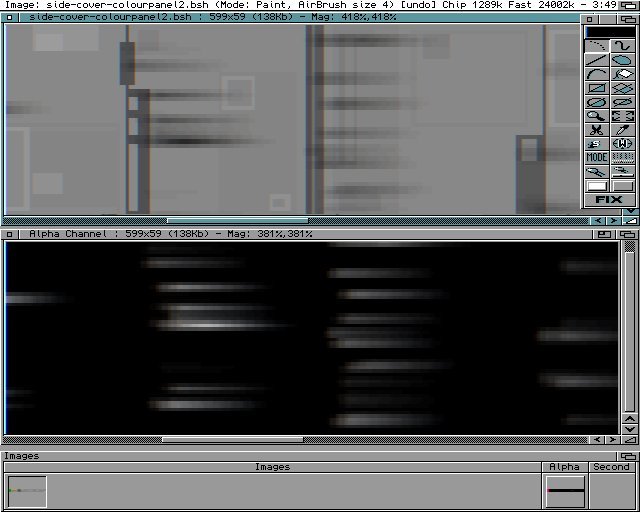
The final step is to apply a new paint layer to the panel Image using the Alpha channel to mask
off the parts we don't want paint to be applied to.
Make sure the panels image is activated, and the Paint Mode is set to Paint. Set the current color to Black.
Click the Fill button (just above and to the left side of fix) to fill the whole image with black paint.
Well, It doesn't fill the whole image, as the alpha channel has masked most of it :) You should now have some lovely oily streaks on your panels.
Click the Image to see it big style.
|  |
The End
Did you follow all that? I hope so! :) Your resulting image should look somewhat like this one (well, not exactly as you'll be mapping a different model than me;)).
I have just a tip or two to add on the end of this:
- If you need lighter streaks, try using the brightness filter instead of paint as your paint mode.
Values between -50 and -80 seem quite good.
- When using a colourmap like this in Imagine (or any other 3d app) It's a good plan to use a specular map. Make a copy of the finished panel map
and bump up the contrast a fair way. This makes a sharper contrast between the panel detail and dirt, and your specular highlights won't appear on the dirty areas.
- Before you add any fine panel and dirt detail to the image, copy it, and give it a very low blur. Use that image as a bump map.
- A layer of random noise seems to look quite good. look under addnoise in the paint modes requester. Experiment with the values
- That's it :)

